DataScience-Industry-Ready-Projects
Git and Github
Task 1:
Demonstrate minimum 15 basic Git command with explanation and screenshot.
git config –-global user.name "ni3choudhary"
git config --global user.email "xyz@gmail.com"
This command sets the author name and email address respectively to be used with your commits.
git init
This command is used to start a new repository.
git clone
This command is used to obtain a repository from an existing URL.
git status
This command lists all the files that have to be committed.
git add main.py
This command adds a file to the staging area.
git add .
This command adds one or more to the staging area.
git commit -m 'Added main.py'
This command records or snapshots the file permanently in the version history.
git commit -a
This command commits any files you’ve added with the git add command and also commits any files you’ve changed since then.
git diff
This command shows the file differences which are not yet staged.
git merge developer
This command merge the mentioned branch[developer] into current branch[master].
git rm -f index.html
This command deletes the file from your working directory and stages the deletion.
git log
This command is used to list the version history for the current branch.
git branch
This command lists all the local branches in the current repository.
git branch developer
This command creates a new branch.
git checkout developer
This command used to change the branch.
Task 2:
Consider that your want to start an open-source project in your organization. Perform all the standard operation to create a repository with minimal permision for all the users. It should contain.
- Proper open source structure
- Proper Readme
- Add 2 collaborator
- Host GitHub Pages using settings (Designed to host your personal, organization, or project pages from a GitHub repository)
1. Proper Open Source Structure –
Please check the files in the repository to run the end to end rain prediction till deployment.
2. Rainfall-Prediction-In-Australia-Deployment (Proper Readme)
• This repository consists of files required for end to end implementation of Rain Prediction in Australia Machine Learning Web App created with Flask on Heroku platform.
Problem statement:
A ML project with EDA and model that helps in predicting next-day rain by training classification models on the target variable RainTomorrow.
Dataset
You can find the dataset here.
Dependencies:
- Python
- Pandas
- Numpy
- Matplotlib
- Seaborn
- Scikit-Learn
- Catboost
- Tensorflow
- Flask
setup
To create a project from scratch use following steps - -
- Clone the repository : https://github.com/ni3choudhary/Rainfall-Prediction-In-Australia-Deployment.git
- Inside the project root directory, Create Python Virtual Environment using below command.
$ python3 -m venv venv
Activate Virtual Environment
$ .venv/bin/activate
          OR
$ .\venv\Scripts\activate
Install Libraries using below command
$ pip install -r requirements.txt
-
Run jupyter notebook to get the pickle file inside Model directory.
-
Now run app.py on terminal to start local server.
$ python app.py
• If you want to view the deployed model, click on the following link: Deployed at: https://rainfall-prediction-australia.herokuapp.com/
3. Add 2 collaborator
username - nitin80855
4. Host GitHub Pages using settings (Designed to host your personal, organization, or project pages from a GitHub repository)
You can find the Github Page here.
Task 3
- Create a Issue in your github repository.
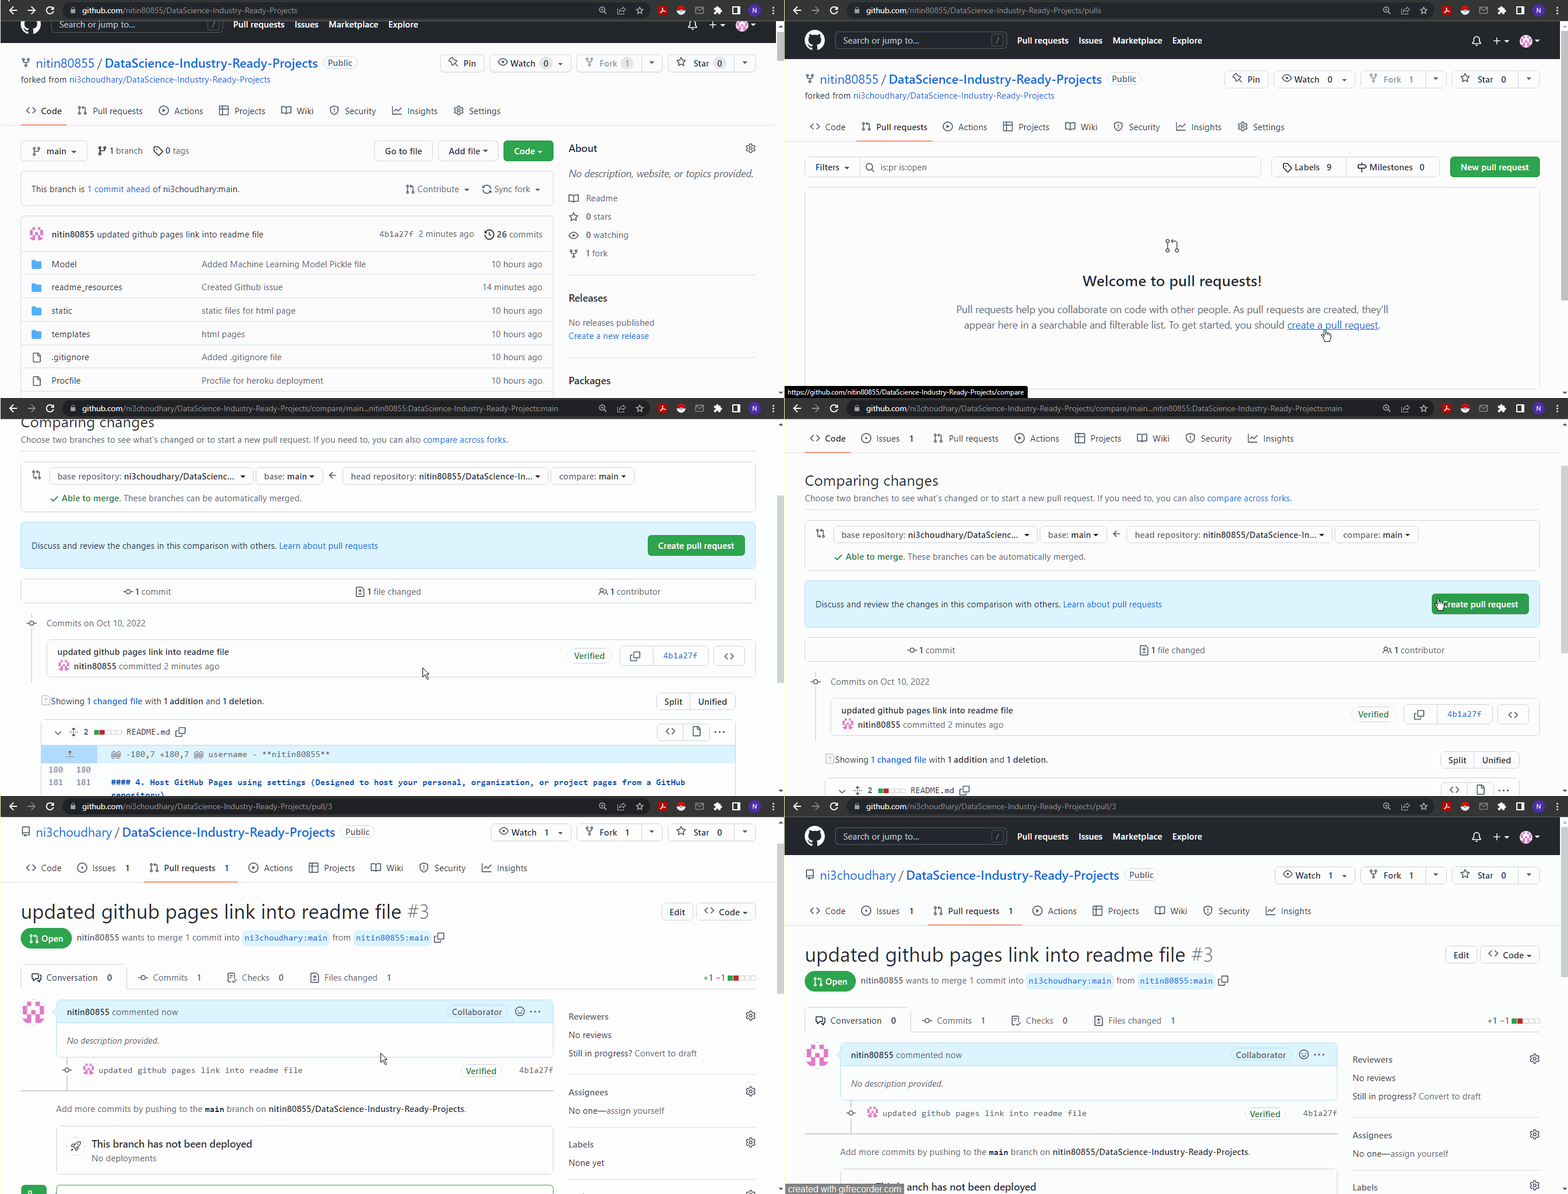
- Raise a pull request.
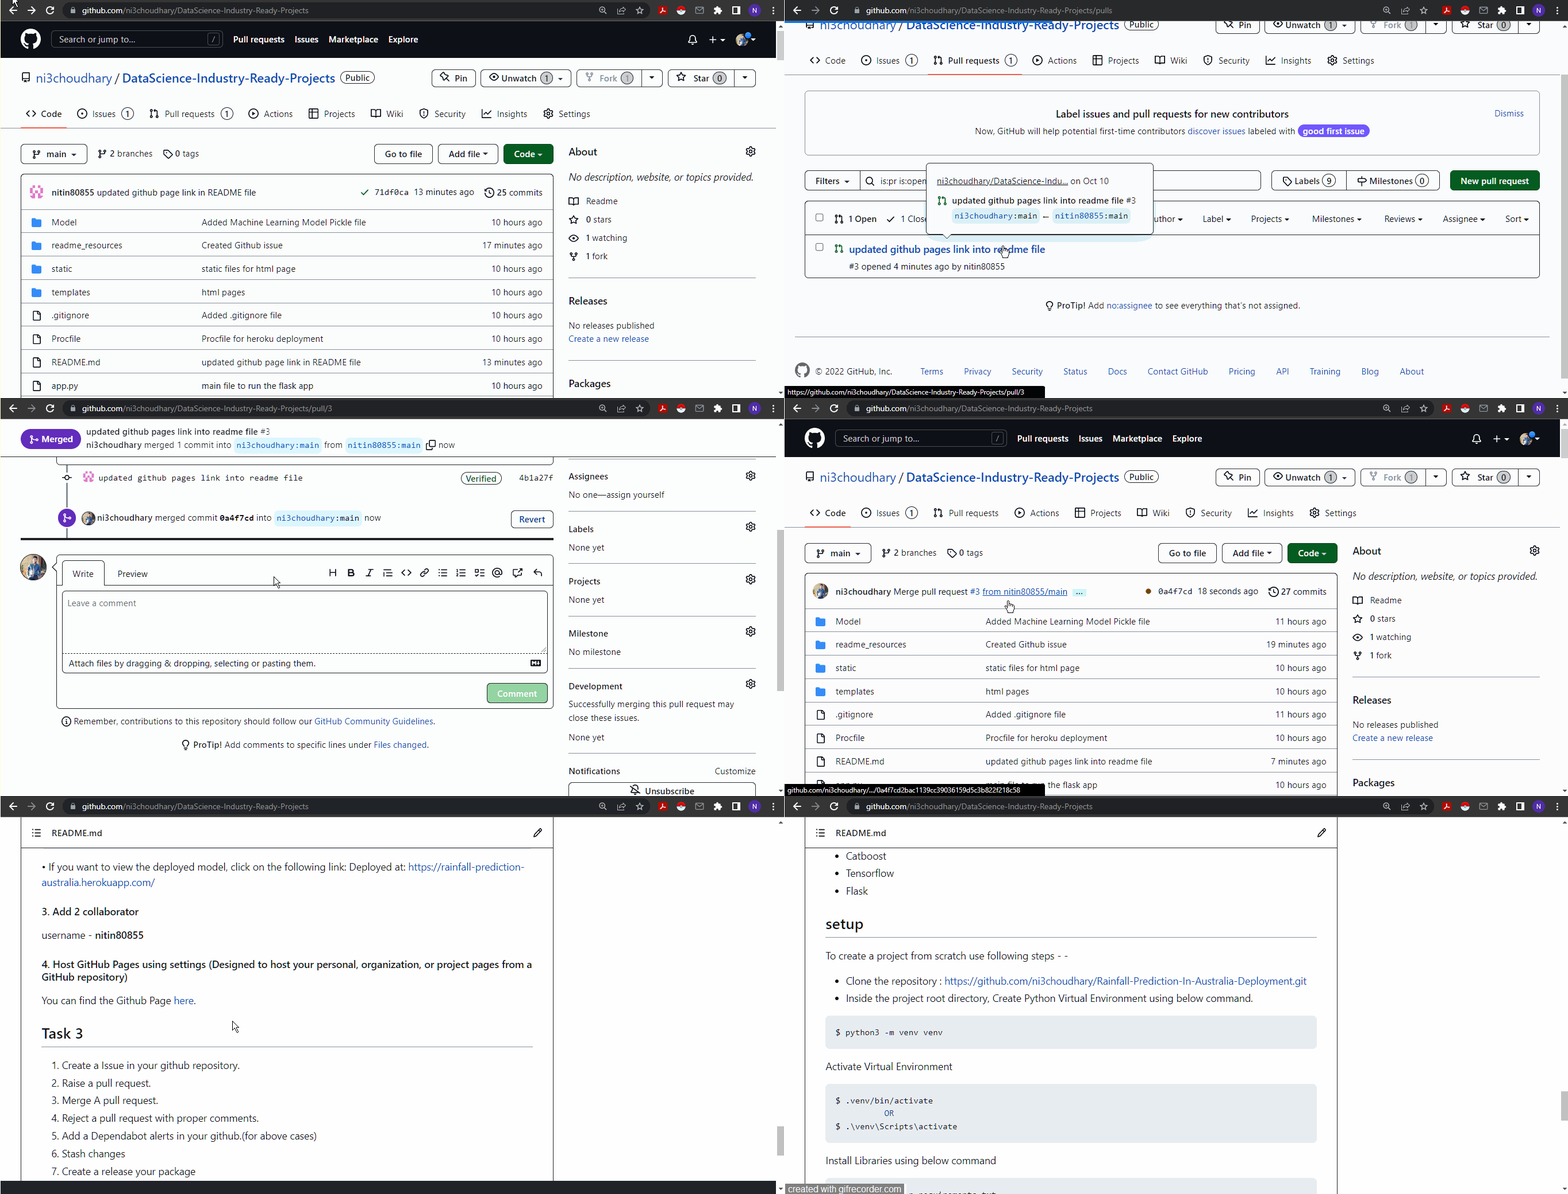
- Merge A pull request.
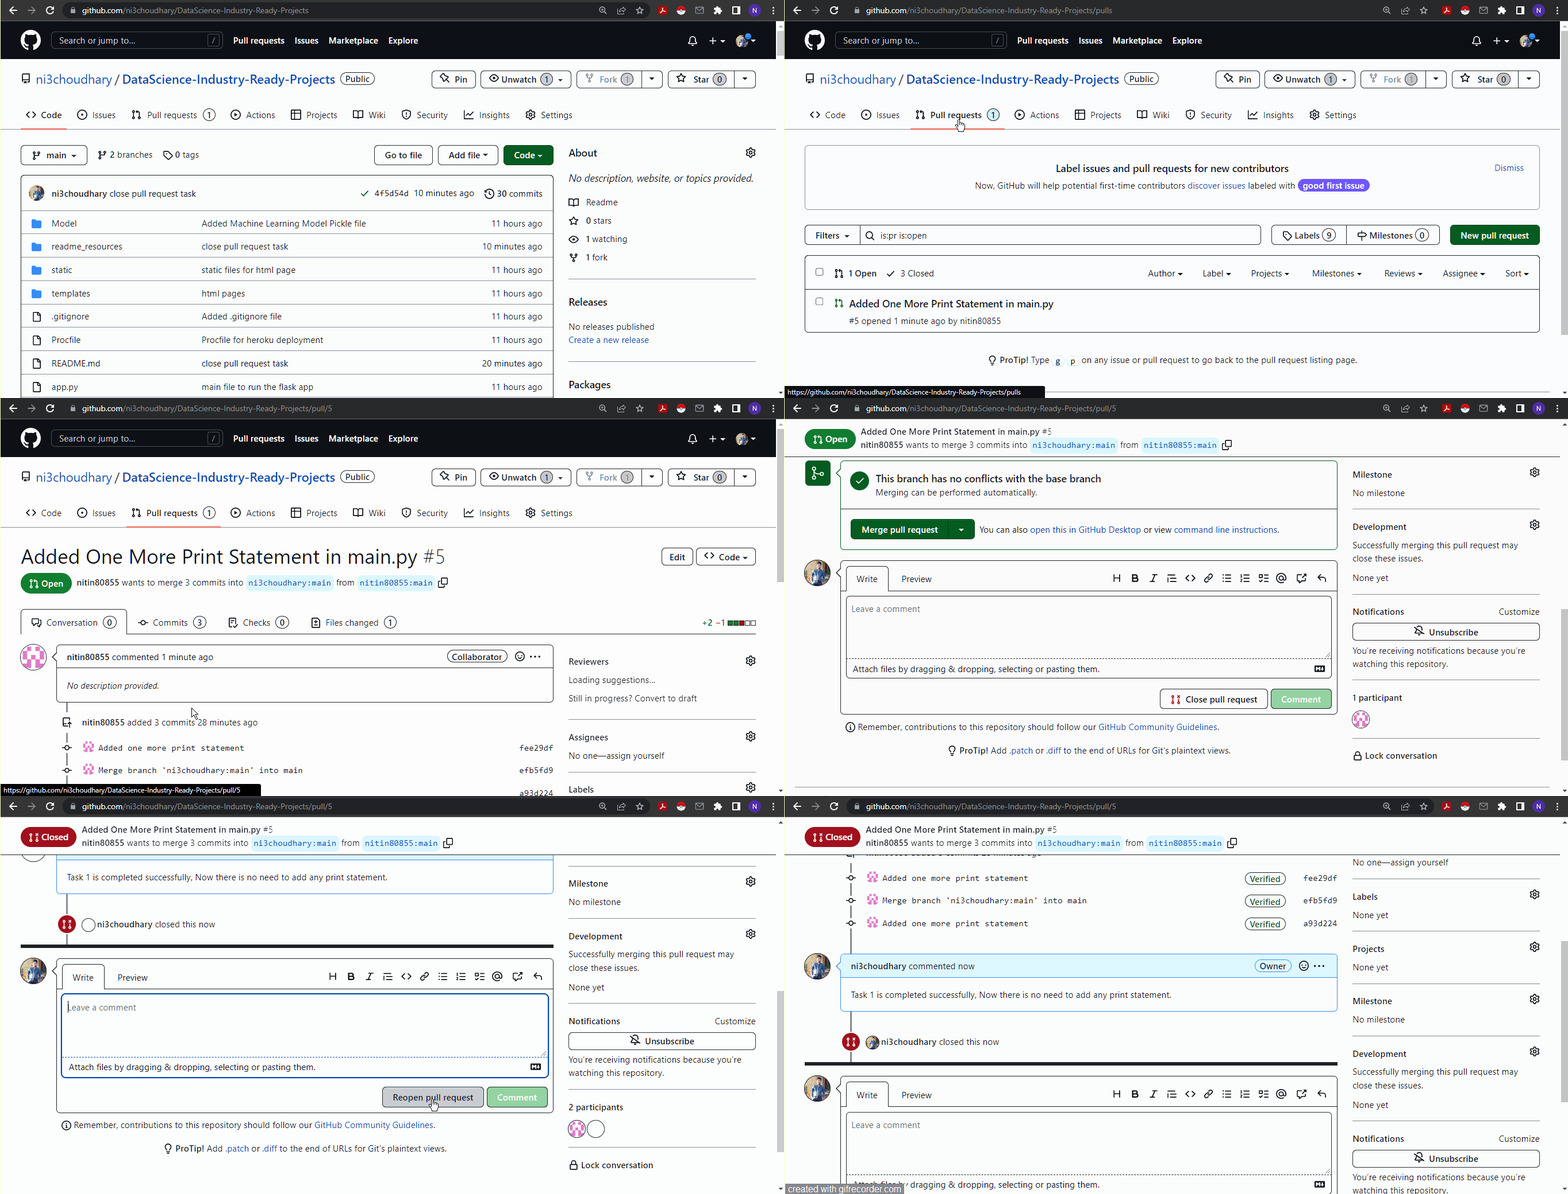
- Reject a pull request with proper comments.
- Add a Dependabot alerts in your github.(for above cases)
- Stash changes
- Create a release your package
- Setup a Projects Board for your project.
1. Create a Issue in your github repository.
2. Raise a pull request.

3. Merge A pull request.

4. Reject a pull request with proper comments.

5. Add a Dependabot alerts in your github.(for above cases)
- Dependabot Alerts Added, Please check .github folder for more information.
6. Stash changes
Run stash command to stash the changes.
View Stashed Changes
If you want to view the details of a stash, run-
To keep a copy of your changes in the stash and also bring them over to your working branch, run-
To bring the changes to your working branch but delete the copy of the stash, run-

